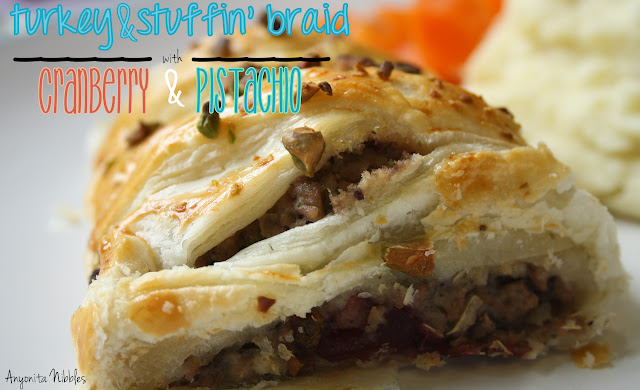
Gluten Free Turkey & Stuffin' Braid with Cranberry & Pistachio

Friday, May 31, 2013

Anyonita Nibbles: Turkey and stuffin' braid with cranberry and pistachio

A few weeks ago while going through link parties, I came across a delicious-looking recipe for a cherry braid smothered with icing from The Princess and Her Cowboys. I instantly wanted to devour it and was anxious to try out the concept Britney showed in her post. But instead of sticking with the sweet, I decided to do something savory.

This braid is made using shop-bought puff pastry, filled with a delicious holiday-esque filling of turkey mince, stuffing, cranberry and onion, topped with pistachio pieces and served with creamy homemade mash, steamed carrots and rich gravy. My family devoured this entire thing in one sitting. We all had seconds. Including the toddler. It's such a simple, versatile recipe that I'm sure your family will love too!


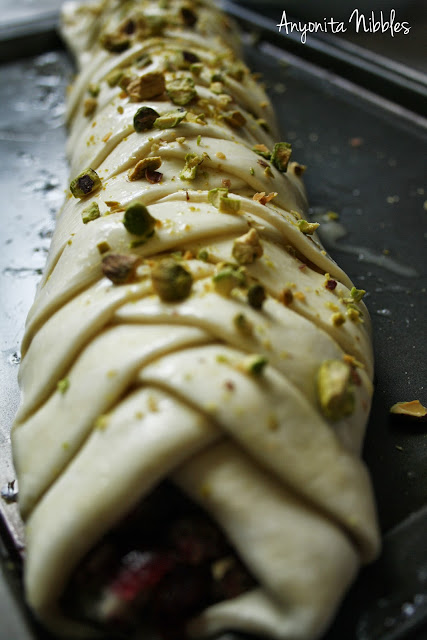
Anyonita Nibbles: uncooked turkey & stuffin' braid with cranberry & pistachio

Ingredients: 

For the turkey braid
1/2 pack gluten free sage and onion stuffing
1 large carrot
1 tbsp olive oil
1 tsbp sage
1 small onion, diced
1 tbsp mayo
1 egg, scrambled
1 packet gluten free turkey gravy
1 pack gluten free puff pastry
2 tbsp milk
3 tbsp cranberry sauce with cranberries
3 tbsp crushed pistachios
3 large potatoes, peeled and diced
250g turkey mince
salt and pepper
butter

All right, let's braid:

Preheat the oven to 200C/400F.

If using shop-bought pastry,take it out of the fridge.

Pour the olive oil into a skillet and brown the mince with salt, pepper and sage.

Make up the stuffing according to the instruction on the pack, while the mince is browning. Remember to just use half of the pack.

Put the potatoes on to boil and the carrots in a bamboo steamer basket on top of the potatoes so that they all cook together. If you do not have a steamer basket, you can put the carrots into a small colander that fits over the saucepan and cook them that way. No matter what you use, cover the bottom of the basket or colander with a piece of greaseproof paper.

The mince should be browned now and the stuffing should be ready as well. If so, mix the both together in a large bowl, along with the cranberry sauce. Set aside and get on with the pastry.

Anyonita Nibbles: uncooked, cut puff pastry, ready for the filling.

Roll out the pastry until it is roughly rectangular. Using clean scissors, cut slits on two opposite sides of the dough. It doesn't really matter what size the slits are and if they're all different sizes, as you can see from mine. Just leave some space uncut in the middle. This is where you'll pile all the filling.
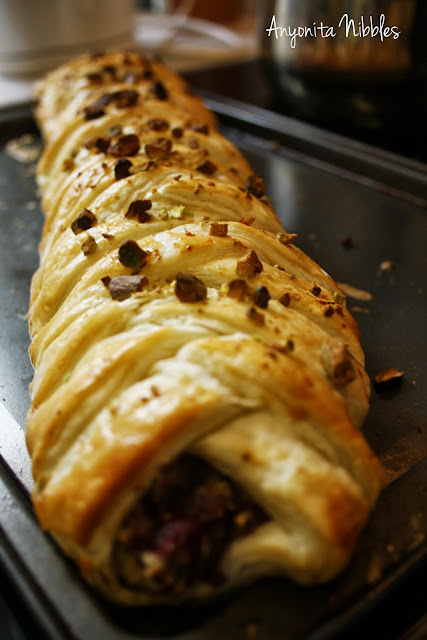
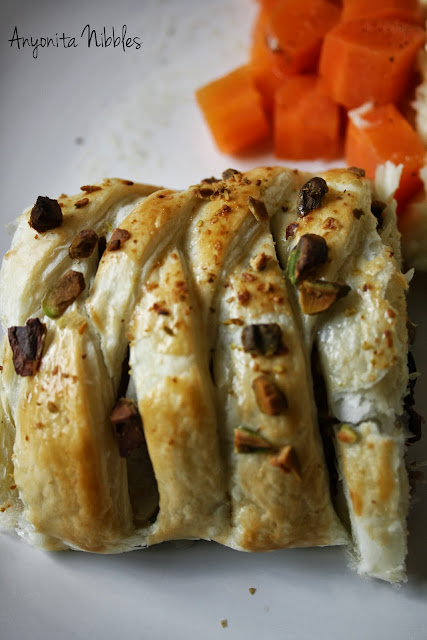
Anyonita Nibbles: cooked turky & stuffin' braid with cranberry & pistachio
Making sure the turkey filling is thoroughly mixed, pile it into the center of the pastry. Next, take a slit of pastry from alternating sides and cross it over the filling like a two-strand braid. If there's a lot of filling you might need to stretch the dough just a bit to properly cover the filling, but take care not to tear it.

When it's all braided, discard any leftover dough (if necessary). I had about two slits of unused dough when I made this. I just trimmed it and tossed it in the bin.

Using a pastry brush, egg wash the braid by brushing the scrambled egg over the tops of the pastry. This helps the dough to go a nice golden color when you're cooking. It will also help the pistachios to stick to the dough and not roll around.

After the egg wash, sprinkle the pistaschio pieces over and bake for 10 to 15 minutes.

While the braid is in the oven, finish off the mashed potatoes, and carrots.
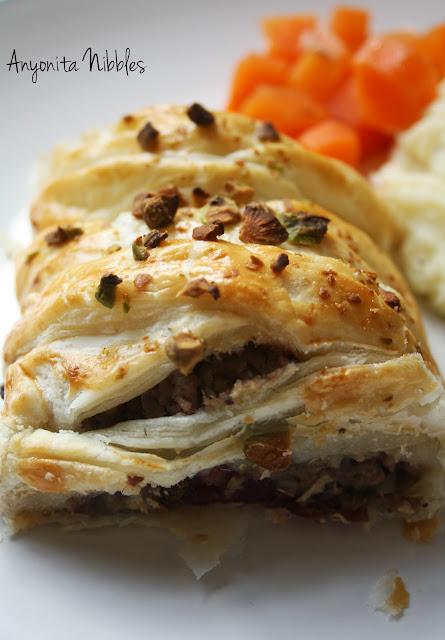
A mouth-watering, simple alternative to a heavy festive meal.Remove the carrots from the steamer basket or colander, fork through a knob of butter and some salt, cover and set aside. Drain the potatoes, and using a fork (for lumpier mash) or a potato masher (for semi-lumpy mash) or a potato ricer (for super smooth mash with no lumps), mash the potatoes.

Add the milk, mayo and butter, salt and pepper to your taste and continue mashing until desired consistency. Once you've reached the consistency you want, incorporate all the ingredients with a wooden spoon.

Next, make the gravy according to the packet's instructions. (You could use homemade gravy if you have some stock piled, otherwise, the lean turkey mince doesn't produce enough jus to be made into a gravy.)

The braid should be ready by now or nearly done. Since the mince is already cooked, you're only cooking the pastry really and bringing it all together. It is done when the pastry is golden brown, like a pie.

Serve wide slices of the braid with the mash and carrots and a bit of gravy.

Cooked turkey and stuffin' braid with cranberry and pistachio


How to Keep Your Blog's Followers

Thursday, May 30, 2013


How to Keep Your Blog's Followers

Written by: on
Anyonita Nibbles Blogging Crash Course: How to Keep Your Blog's Followers
It's time for the second installment of the Blogging Crash Course, helping you develop and grow your blog into the powerhouse you know it can be! :) This week, I thought it would be important to address one of the probing questions all bloggers ask themselves eventually: how do I keep my followers?!

I feel it's fair to warn you: I'm not a professional blogging consultant. I've just become committed to growing my blog and helping others do the same. So what qualifies me to share blogging strategies with you? Personal experience!

Until January 2013, Anyonita Nibbles was just a hobby. I had 14 followers, 13 of whom were friends I had known for years. I had no email sign ups and my Facebook likes were in the double digits. Barely. I was doing a bit better on Twitter in terms of followers, but nothing to brag about.

In January, I got serious with my blogging. I wanted one of those enviable blogs with loads of followers and loads of PR opportunities. I wanted a blog that generated conversation. I wanted recipes that people wanted to pin and make and I wanted to gain some type of income from my efforts. So, I got serious and strategized and saw pretty quick results.

By March 2013, my Goggle Friend Connect count more than tripled. My email signups had increased by 800% and overall traffic to Anyonita Nibbles increased by 400%. My Facebook likes grew and I became active and engaged on Twitter. I optimized my Pinterest and I attended and started hosting link parties. All of which resulted in the type of growth I wanted. Most importantly, I did all of that while maintaining my followers and gaining new ones.

How to Keep Your Blog's Followers  

1. Respect their contact details
One of the best ways to lose followers is to compromise their email and subject them to spam. If you have a sign up form on your blog or record the email addresses of your link party participants, it is up to you to keep that information safe and protected.

Just this week alone, I received mass emails from three separate blogs, all addressed to a long list of other bloggers. I had access to the emails of people I'd never come into contact with and they had mine. Our privacy and our contact details were compromised and violated. As a result, I've removed myself from these lists. I'm not insinuating that any of these blogger spams other bloggers, but they're not doing anything to prevent it happening. As a result, I'm not exactly rushing out to maintain communication with them or to read their blogs.

How do you get around this? We all want to communicate with our followers, that's the reason we keep their details in the first place, but there's no excuse for not keeping those details securely. There are loads of  free email marketing websites and programs available. These programs will keep track of all your email signups and let you send mass emails without anyone else seeing who else is receiving the email. I personally use Mad Mimi, but there are dozens of others to choose from.

Of course, if you'd rather not use an email marketing program, that's fine as well. Just ensure that you blindcopy (BCC) your emails to protect your followers and respect their information. When you blindcopy, your recipients will only see your email address, instilling confidence in your ability to respect their privacy. Plus, it also looks a bit more professional.

2. Blogging isn't a one way street
You've got all these lovely followers, but have you visited their blogs too? Do you know what kinds of things they write about? Knowing what your bloggers blog about can help you when coming up with your own posts and in providing your readers with content that interests them. Also, your followers are more likely to stick around when they feel like you're engaging with them. Think about it, if you're trying to have a conversation with someone but they're not saying anything, how long would you stick around?

Don't be tempted to get hung up on gaining new followers without learning more about them. Of course, you won't become best bloggy friends with everyone, but you won't develop relationships with anyone if you don't try at all.

3. Embrace variety
Not all of your bloggers want to read the same things. I've found the best way to ensure that I'm catering to as many of my readers as possible is to offer them a bit more variety in my posts. I've chosen to do this by inviting guest posters to my blog and giving them the opportunity to post what they'd like.


This is beneficial in a number of ways:
  1. I'm not having to research a variety of subjects or techniques that I'm unfamiliar with just to create a post 
  2. The guest posters will most likely choose a recipe (in my case) that is different from anything I've posted recently, which instantly garners attention from my active and engaged followers. 
  3. A drastic change in posting style like what you get when you have guest posters, often helps to eke out some stagnant followers who only dabble by occasionally.  
  4. Lastly, guest posting can tap your blog into a new set of  SEO keywords. If your SEO is good, this type of post can generate an entirely new traffic.

4. Give them a reason to come back
In my first Blogging Crash Course post, I mentioned that 70% of blog readers are other bloggers. Chances are, your readers will spend a good majority of their time drumming up their own blogs and won't have ages to spend reading the blogs they follow. Personally, I follow numerous blogs but don't have any that I check every day. There's just not enough hours in the day, so I rely heavily on the blogs I follow to entice me. Since I check my social media religiously, I'm always on the look out for their updates and when something looks interesting, I go check it out.


I know for a fact that many of my own followers have the same mentality when it comes to reading, so I cross-post every new blog post I write on Facebook, Twitter and Pinterest, to start with. Eachweek, all of the posts are recapped and sent directly to my email list via Mad Mimi. Maybe the sound of one of my recipes or the look of one of the photos catches their attention and encourages them to stop back by. It doesn't matter what it is as long as they return and as long as I do everything in my power to encourage their return.

5. Don't slack off now
In blogging, consistency is key. Not just consistency in the quality of the posts you write, but consistency in your frequency of posting. Followers will stick around when you're engaging with them on a continual basis and are providing regular content. I'll use the analogy of friendship again, how difficult would it be to maintain a friendship when you only spoke to your "friend" every two weeks or once a month? If you've already gained followers, don't slack off now! Keep up the momentum and keep posting. They'll stick around!

6. Acknowledge and be confident in your abilities
 Blogging is hard work. It takes a lot of consistent hammering before the nail goes through. If you've already got some followers (even if it's only a handful) celebrate that fact and congratulate yourself! This is proof that you can do it. Take confidence in that and keep working at it. Do the things that you'd want the blogs you read to do and don't forget to be aware of your own capabilities.
Mad Mimi Email Marketing


  Image Map

Tasty Tuesdays #12 + 20 "Why Didn't I Think of That?!" Dishes RoundUp

Tuesday, May 28, 2013

Welcome to Tasty Tuesdays!
I'm excited that you're interested in sharing your delish dishes with the blogging community through my link party. Scroll down to see if you've been featured & if you have, don't forget to display a featured badge & help attract other bloggers.

As always, I'd love it if you helped to spread the word about this party by inviting your blogging buddies to participate. Don't forget to grab a participator's button to display on your blog where you see fit. Also, if you've been featured, swipe a snazzy button for your blog/newsletter:

Grab button for Anyonita Nibbles

Grab button for Anyonita Nibbles


I'd love to introduce you to this week's fabulous co-hosts: 


Jess from Hungry Harps
 Holly from Mess Makes Food

  Want a guaranteed way to increase your followers and grow your blog? Want to meet other fabulous bloggers? Consider becoming a co-host! You'll grow your blog plus get one jam-packed week of online marketing for your blog! Interested? Send me an email to munchies [at] anyonita-nibbles [dot] com!

Before we get to the features and the party, have you entered our Pasta Lover's Giveaway? If click the icon to be taken to the entry (it will open in a new tab) enter & then come back & party with us! 
 
Featured from last week's party

Want to be featured too? Then remember to stop by and visit other people's blogs!

This week, we've got a delicious roundup that we're all quite excited about! How often is that you stumble across a recipe and think, "Why didn't I think of that?!" About a million times, right? Right! As I was looking through all the links from last week's party and pinning each post, I kept saying, "Oh, why didn't I think of that?!" That's where the theme came from! Unfortunately, I couldn't include all of the posts, although I would have loved to include more! But here's what I and my lovely co-hosts think were the best of the best, the 20 dishes that made us wish we'd created them ourselves, in no particular order.


1. Chocolate Stout Doughnuts from Living Better Together
2. Basil Pesto Hummus from Sensationally Seasonal
3. Asian Meatball Sub from Dixie Chik Cooks
4. Apple Cinnamon Delight from Spatulas on Parade
5. 3D Painted Dino Cookies from Crystal's Tiny Treasures
6. Cupcakes for a New Baby Boy from Sew Lah Tea Dough
7. Key Lime Parfait from SteakNPotatoesKindaGurl
8. Key Lime Coconut Cheesecake Mousse from The Brunette Baker
9. How to Can Pink Applesauce from Diary of a MadMama
10. Oatmeal Banana Cake from Treat & Trick
11. Soft Gooey Marshmallow Popcorn from Dessert Now, Dinner Later!
12. Doritos Crusted Chicken Strips from Six Sister's Stuff
13. Peanut Butter Chocolate Chip Pretzel Bars from Dessert Now, Dinner Later!
14. Ranch Chicken Enchilada Casserole from Mostly Homemade Mom
15. Why and How to Use Coconut Flour from The Grass Skirt
16. Salted Oatmeal Chocolate Chip Cookies from Prudent Living
17. Skillet Peach Pie from the Great Big Giant Food Basket
18. Southwestern Chopped Chicken Sandwich from Saving Cent by Cent
19. Spiced Apple & Giant Sultana Bundt with Maple Glaze from Dollybakes
20. Tequila Marinated Grilled Chicken + Guacamole Tacos from SteakNPotatoesKindaGurl

Be sure to check out these delicious recipes & pin what you like!

Are you excited to have been featured?! Don't forget to grab our featured button & post it on your blog! :)

A few party suggestions:
  1. Follow your host and your co-hosts socially (however you'd like) and let us know so we can do the same in return!
  2. Visit the link before yours. Leave a comment stating that you stopped by. (We all love to read comments, so share the love!)
  3. Spread the word; grab a participator's button and display it on your blog.
  4. Link to your recipes--no giveways or promos, please.
  5. As a participant, you acknowledge that photos from the post you link may be distributed as a part of the Tasty Tuesdays Feature and/or across my social media platforms. If this is the case, all photos will be credited back to your sites and posts and credit will be given.

All right, here we go, party people!


Image Map
We're so social! Why not connect with us?


  Image Map

Gluten Free Homemade Linguine with Zesty Tomato Sauce + Pasta Lover's Giveaway

Monday, May 27, 2013

Homemade Linguine with Zesty Tomato Sauce
Ever since I started cooking seriously, I wanted to make my own pasta. This year, for my birthday, my boys got me a pasta machine and I've been making pasta ever since! There's something extra delicious about soft, handmade pasta that I love.

Pasta Lover's Giveaway Logo LargeI've been following a simple two-ingredient base recipe that produces amazing, thin pasta. While it's true that it does take a bit more effort to prepare than just opening a packet, I don't think shop bought pasta can hold a candle to the homemade stuff. On pasta-making days, I usually prepare the dough in the morning while Callum's napping and then  about an hour before dinner, I run it through the machine and allow it to rest again before tossing it in boiling water for just a minute or two.

To celebrate my love of pasta and my amazing new pasta machine, I've got a new giveaway for you guys: pasta lover's giveaway! You can find more information about it and enter to win at the bottom of this entry. Jess from The Hungry Harps and Holly from Mess Makes Food are also running this giveaway with me, which means more opportunities for you to enter! In fact, your name can be entered up to 105 times into this giveaway.


Two plates of homemade linguine with zesty tomato sauce

Ingredients: 

For the pasta
1 egg
1 egg yolk
140g gluten free bread flour


For the zesty tomato sauce
1/4 cup extra virgin olive oil
1/2 tsp sea salt
1/2 tsp cayenne pepper
1 tsp paprika
1 can tomatoes with herbs
3 garlic cloves
zest of 1/2 a lemon
sprinkling of Italian herb mix*
parsley
pinch of sugar


All right, let's cook:

To make the pasta, put the flour into a food processor along with one whole egg and the yolk of one egg.

Whizz until the mixture resembles fine bread crumbs.

It shouldn't be dusty (too much flour) and it shouldn't be clumbed into a gooey ball (over whizzed).

Tip the bread crumb-like mix out onto a lightly floured surface and knead into a ball, scraping up any leftover bits with a dough scraper.

Knead quickly, only for about 1 minute. Your dough should be hard to knead and stiff. Once kneaded, wrap in clingfilm and leave to rest in the fridge for an hour.

When rested and about an hour before you're ready to serve, remove the dough from the fridge and cut in half with a dough scraper.

Using your palms, roughly flatten one half of the dough.

Fold over in thirds and pass through the machine at its widest setting.

Refold the dough, turn clockwise 1 turn (make the bottom, the side) and pass through machine.

Repeat about 7 times, until dough is rectangular and shiny. Change the setting on the machine and repeat the last 2 steps until you are at the last setting of the machine.

Flour both sides of the dough and pass the dough through the noodle attachment, cutting the dough with kitchen shears once you have reached the desired length. Allow the dough to rest in a bowl, covered with a dish towel for about 30 minutes to an hour.

Meanwhile, make up the zesty tomato sauce by combining the extra virgin olive oil, cayenne pepper, paprika, salt and garlic in cold saucepan.

Stir together while you gradually heat it to medium. Saute about a minute until ingredients are fragrant.

Stir in tomatoes along with a pinch of sugar a d heat to a gentle simmer. Remove from heat.

Add the lemon zest and juice, saving some zest to garnish each dish.

Homemade Linguine with Zesty Tomato Sauce and a Sprinkling of Parsley

Did you think I forgot about the Pasta Lover's Giveaway????
Pasta Lover's Giveaway log small
Freestanding Koziol Gina Pasta Server
Freestanding Pasta Server
Of course I haven't! Here's your chance to win two amazing pasta-related tools! Both prizes are from my new favorite home gadgets shop, Exit Interiors. The first is a stunning freestanding Koziol Gina pasta server provided for by the lovely people at Exit Interiors. They've nicely donated this prize to us and I think it's fab! As the pasta server has been donated, the winner will receive it in green.
Koziol Dough Scraper
Dough Scraper

The second prize you can win today is a Koziol dough scraper, also from Exit Interiors. This dough scraper is perfect for making your own pasta (or bread)! I'm purchasing this dough scraper, so the winner will be able to choose from the range of colors available on the Exit Interiors website. 

Are you ready to win? You have one week to enter and loads of chances to get your name in the hat, too! :) Good luck! 


a Rafflecopter giveaway  

WEEKEND SHOW OFF!

Sunday, May 26, 2013


 Are you guys ready to link up with me, Jessica at the Wondering Brain,  Asha from the Whimsical Peacock, Lisa from Squishable Baby and Marty from Thoughts on Life and Money. Before you link up, why not stopping by each my co-host's and host's blog and following them socially? :) They all have lovely blogs and I'm sure you'll find something of interest when you visit!

Be sure to visit Jessica's blog for party rules and to see who's been featured!

Before we go on, I have to apologize for not posting this earlier. Unfortunately, I was with Callum, my toddler, in the emergency room from about 5 am on Friday morning until yesterday afternoon and wasn't in a position to get this link party posted.

Okay, it's time to show off! 


We're so social! Why not connect with us?

  Image Map

6 Ways to Make Your Blog Grow for Free

Thursday, May 23, 2013


6 Ways to Make Your Blog Grow for Free

Written by: on
I decided to start a whole series on blogging tips and tricks--not just for newbie bloggers, for everyone. Periodically, I hope to post some really useful info that you can apply to your blogs. Everything I post will be things that I actually do so I have 100% faith and confidence in them.

I'm no blogging expert. Let me admit that straight away. So what qualifies me to share blogging strategies with you? Personal experience! Until January 2013, Anyonita Nibbles was just a hobby. I had 14 followers, 13 of whom were friends I had known for years. I had no email sign ups and my Facebook likes were in the double digits. Barely. I was doing a bit better on Twitter in terms of followers, but nothing to brag about.


In January, I got serious with my blogging. I wanted one of those enviable blogs with loads of followers and loads of PR opportunities. I wanted a blog that generated conversation. I wanted recipes that people wanted to pin and make and I wanted to gain some type of income from my efforts. So, I got serious and strategized and saw pretty quick results.


By March 2013, my Goggle Friend Connect count more than tripled. My email signups had increased by 800% and overall traffic to Anyonita Nibbles increased by 400%. My Facebook likes grew and I became active and engaged on Twitter. I optimized my Pinterest and I attended and started hosting link parties. All of which resulted in the type of growth I wanted. Most importantly, I did all of that without spending a penny! In fact, as a result, I started earning money and perks through my blog.


6 Ways to Make Your Blog Grow for Free

1. Bloggers are Friends not Food

Make friends with other bloggers! As bloggers we all want the same thing: to be read and appreciated and for our work to be shared. There's no need to get competitive! Respect your fellow bloggers: did you know that about 70% of an average's blog's readers are other bloggers? Become friends with other bloggers, engage with them and work with them, not against them. Build relationships by leaving meaningful comments and support them by sharing their work.

2. Change your Commenting Style

We all like to get comments, but let's be honest. Comments that simply say, "Yum" or "How great" are pretty boring and counterproductive! Comments that at least acknowledge an aspect of the post and inspire some type of dialogue are best. You don't have to write a book, you don't even have to read the entire post--just leave thoughtful, meaningful comments and you'll start to build relationships.

3. Make your Blog Known

What's the point in all of this hard work if no one's reading your blog? To truly benefit, you need to put your blog out there! One of the best ways I've found for generating traffic to my blog is through link parties and blog hops. Find relevant parties to attend and share relevant posts that are engaging. Remember to visit other blogs, too! Don't be content with just participating in link parties, co-host some as well and find opportunities for guest posting to tap into a whole new set of bloggers. I welcome guest bloggers and co-hosts for my link party; if you're interested, let me know!

If link parties aren't your thing, considering doing a button swap! For free, you can display your blog logo on someone else's blog in exchange for you displaying their logo too! If you're looking for a blog to swap with, check me out! I do swaps here.

4. Keep the Conversation Going

Have you ever asked someone a question and they didn't answer?
Have you ever been walking through a door behind someone and they let it close in your face?

That's what not replying to comments is like! It doesn't matter if you reply on your blog or reply solely by email or reply on the blog of the person who left the comment. JUST REPLY! Even if you only say "Thank you", small communication is better than no communication and people are more likely to engage with you when you engage with them! Even if they don't become a regular visitor! No one becomes a regular without stopping by that first time.

5. Make it Easy for People to Follow You

If you want followers, don't make them work for it. Provide links to your social media networks near the top of your blog. Don't be afraid to ask people to like or follow you either, and don't be afraid to ask more than once! A quick look at Anyonita Nibbles, I ask for followers in my welcome message, I include my social media buttons in every post and I also have them on my sidebar and at the bottom of every email I send from my blog's account.

6. Cross Post like Crazy

Not every one uses all the same social media. I have bloggy friends who are follow me on Facebook and GFC but who aren't on Pinterest or Twitter. I have friends on Twitter and G+ who aren't on Facebook, etc. The best way to reach your followers and to get new ones is to share your posts on all of the social media networks you use.

I'm not saying you should use them all! For instance, I don't use Bloglovin', but I do use Pinterest, Twitter, Facebook, GFC and G+. So every time I post something, I share it on all five networks. Blogger makes it really easy to do this: at the bottom of every post there's a one-click option f0r sharing on G+, Twitter and Facebook. I've installed the Pin It button to my toolbar and simply click on it after I've published a post. It takes two seconds and it means every thing I post gets maximum exposure from my followers with minimal effort!

That's it for the course this week! Be sure to sign up for my newsletter to get updates straight in your inbox just in case you miss one!

Disclaimer:
The first three tips in this post, first appeared in a guest post on The Wondering Brain. I've been working with Jessica for the last two weeks, co-hosting her SHOW OFF link party at the weekends so it was really nice to get a guest post in, too!

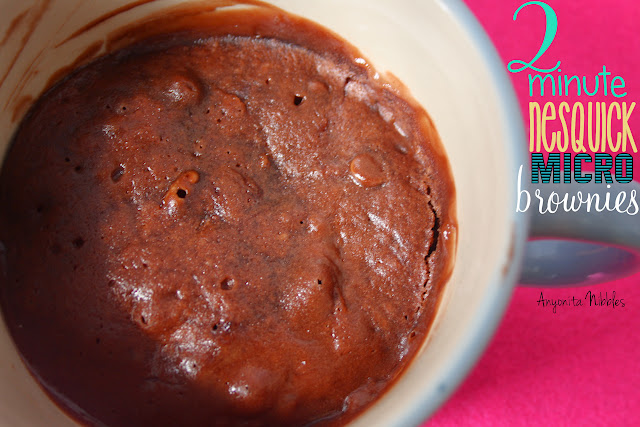
Gluten Free 2 Minute Nesquick Micro Brownies

Wednesday, May 22, 2013

2 Minute Nesquick Microwave Brownies
I'm trying to fall in love with my microwave. Ordinarily, I hate it. It's small and has a turn dial instead of a digital display. It doesn't cook things evenly and the shortest amount of time it can accurately process is five minutes. FIVE! We're talking about microwave cooking here! Most things only need a few seconds in the microwave and mine refuses to acknowledge anything less than five minutes.

When we microwave anything, we have to get other appliances involved--the timer or the stop watch on our mobile phones. It's ridiculous. That being said, I've been wishing for a new microwave and spending much of my "me time" visiting links like this and lusting after practically everything on the page. Unfortunately, we can't afford £50+ for the microwave of my dreams at the moment. I mean, we have one and shoddy as it is, it works. Make do, right? Right!

So, in an attempt to be swept off my feet by our microwave, I decided to try a variation of those microwave brownies that are dominating Pinterest at the moment. Most of those recipes call for eggs in the mix and eggs + microwave = fastest way for me to fall eve more out of love with my microwave than I already am! But after seeing The Pin Junkie's amazing recipe for micro brownies without the egg, I wanted to try them!

As always, I've changed this recipe around a bit and used Nesquick instead of cocoa powder, I added a bit more flour, a bit more butter and some chocolate chips, too! This is quite possibly the best thing that has ever been in my favorite blue mug! This resulted in a delicious chocolatey brownie with a texture less like homemade brownies and more like ... those Little Debbie brownies. Not bad, but I think I prefer homemade oven brownies!

Tasty Tuesdays #11 + 10 Incredible Comfort Food Recipes

Tuesday, May 21, 2013

Welcome to Tasty Tuesdays!
I'm excited that you're interested in sharing your delish dishes with the blogging community through my link party. Scroll down to see if you've been featured & if you have, don't forget to display a featured badge & help attract other bloggers.

As always, I'd love it if you helped to spread the word about this party by inviting your blogging buddies to participate. Don't forget to grab a participator's button to display on your blog where you see fit. Also, if you've been featured, swipe a snazzy button for your blog/newsletter:

Grab button for Anyonita Nibbles

Grab button for Anyonita Nibbles


I'd love to introduce you to this week's fabulous co-hosts: 


Jess from Hungry Harps

 Holly from Mess Makes Food

  Want a guaranteed way to increase your followers and grow your blog? Want to meet other fabulous bloggers? Consider becoming a co-host! You'll grow your blog plus get one jam-packed week of online marketing for your blog! Interested? Send me an email to munchies [at] anyonita-nibbles [dot] com!

Featured from last week's party

Want to be featured too? Then remember to stop by and visit other people's blogs!

This week, we've got a delicious roundup of 10 Tempting Desserts!

10 Incredible Comfort Food Recipes Roundup

1. Chips & Salsa Chicken Bake from Mostly Homemade Mom
2. Avocado and Cheese Stuffed Buns from Dixie Chik Cooks
3. Golden Syrup Cake from Sew Lah Tea Dough
4. Lime Dream Cake from Cookin' for the Seven Dwarfs
5. Tiramisu Brownie Trifle from The Cookin' Chicks
6. Fresh Veggie Pasta Skillet from On Sugar Mountain
7. Pork Tenderloin Sandwich with Apple Jicama Slaw from Niki's Sweet Side
8. Easy Black Bean Soup from Foody-Buddy
9. Blackberry White Chocolate Cheesecake from Fresh Eggs Daily
10. Gingerbread Pancakes from Mess Makes Food

Be sure to check out these delicious recipes & pin what you like!


A few party suggestions:
  1. Follow your host and your co-hosts socially (however you'd like) and let us know so we can do the same in return!
  2. Visit the link before yours. Leave a comment stating that you stopped by. (We all love to read comments, so share the love!)
  3. Spread the word; grab a participator's button and display it on your blog.
  4. Link to your recipes--no giveways or promos, please.
  5. As a participant, you acknowledge that photos from the post you link may be distributed as a part of the Tasty Tuesdays Feature and/or across my social media platforms. If this is the case, all photos will be credited back to your sites and posts and credit will be given.

All right, here we go, party people!


Image Map
We're so social! Why not connect with us?

  Image Map

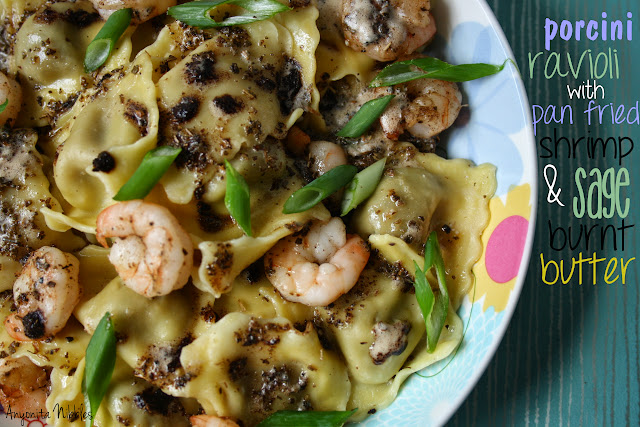
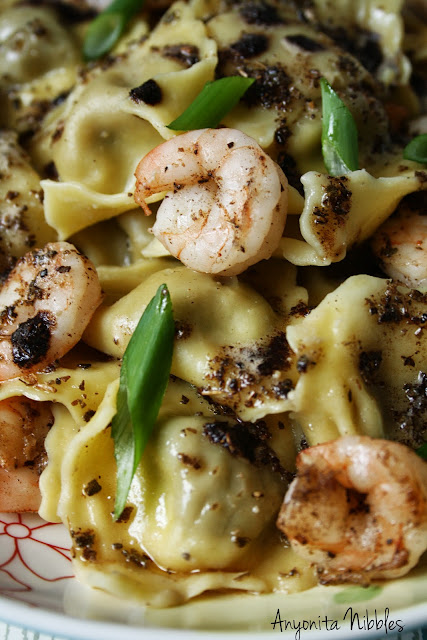
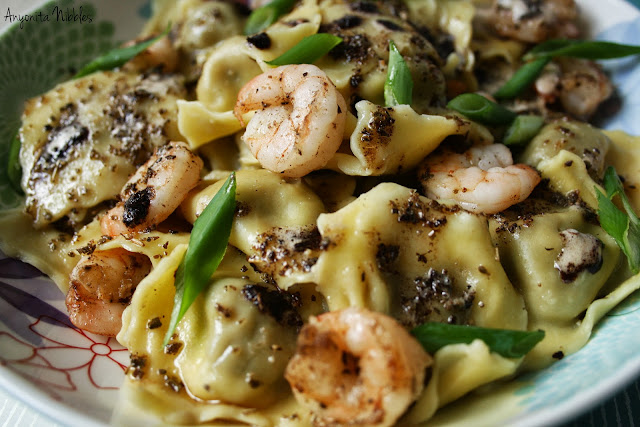
Gluten Free Porcini Ravioli with Pan-fried Shrimp and Sage Burnt Butter

Monday, May 20, 2013

Porcini Ravioli with Pan Fried Shrimp and Sage Burnt Butter

Sometimes, when you have a food blog, people assume that you're some type of Martha Stewart clone, spending hours in the kitchen every night whipping up Michelin star meals for your family. Actually, that couldn't be further from the truth...at least, in my kitchen anyway!

It's true that being a stay at home mom makes it easier to keep more time-consuming dishes like homemade pasta instead of just ripping open a packet. But, I think it's important to stress:
  1. I don't always have time to make homemade pasta
  2. I don't always feel like making homemade pasta
  3. I love packet pasta and our cupboard is quite impressively stocked with a variety of dry, packet pasta and our freezer is stocked with packaged fresh pasta, too.
  4. I am not Martha Stewart
  5. I love shortcuts
Wanting to show that you can make a delicious, food blog worthy dish by taking the lazy route was important to me and was the basis behind this recipe. It takes 10 minutes, 15 tops. And the only bit of hands-on cooking involved is frying some shrimp and making a sauce from the fat used to cook the shrimp. It's so easy and perfect for a busy weeknight when you'd rather just get a takeaway than cook.

Easy dinner of shrimp and pasta

Ingredients: 

For the pasta dish
1/2 cup butter
1 medium sized spring onion, sliced
200g uncooked shrimp
400g gluten free porcini ravioli
sage to taste
salt and pepper

All right, let's cook:

Begin by cooking the pasta according to the instructions on the packet.

In a small skillet, melt the butter over medium heat and add the shrimp. Cook until the shrimp is done (about 2 minutes).

Remove the shrimp with a slotted soon and set aside. Increase the heat slightly, add the sage and seasoning and allow the butter to "burn". This should take a further two to five minutes.

Just before its done, add the shrimp back to the sauce and spoon over the cooked pasta. Sprinkle with the spring onions and a bit more sage if you'd like, and serve.

Ready to serve: porcini ravioli with pan-fried shrimp and sage burnt butter

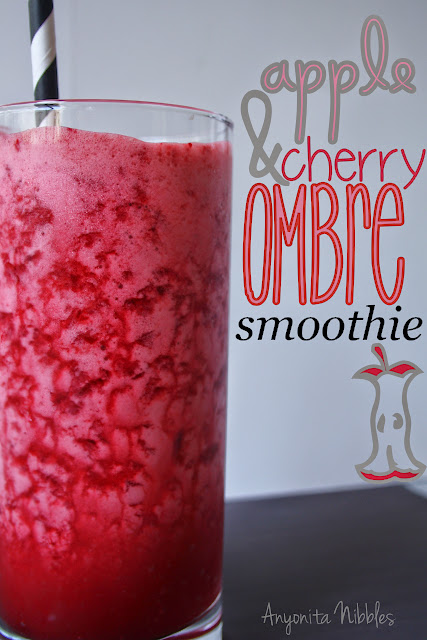
Gluten Free Apple & Cherry Ombre Smoothie

Friday, May 17, 2013

Apple and Cherry Ombre Smoothie
You guys know by now that I love smoothies! (I must do to have an ebook, right?!) I love how simple it is to just tumble ingredients into a blender or smoothie maker and come out with a delicious end result. I made this smoothie after coming back from the gym. It was lovely and refreshing. And the frozen cherries give it a nice tartness that's perfect to help you feel re-energized! There's sugar free apple juice for this smoothie's base and just a little bit of frozen fat free yogurt to help thicken it up. No sugar, no honey; it's just good for you!


Gluten Free Slowcooker Pulled Chicken in Brioche

Thursday, May 16, 2013

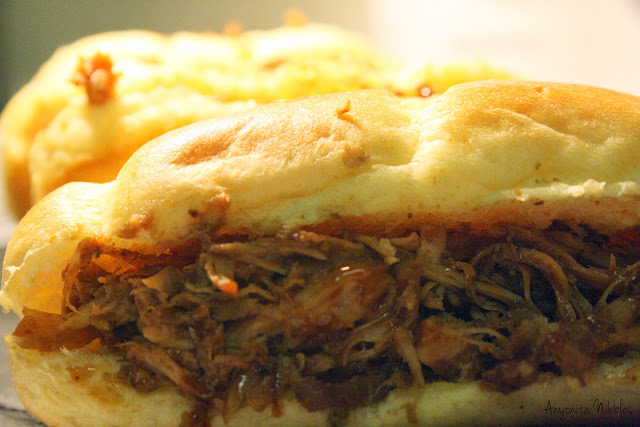
Slowcooker Pulled Chicken in Brioche
My husband and I loved this. The succulent, tender chicken with the tang of barbecue sauce plus the sweet brioche worked well together. I served it with sweet corn and wedges, too. It was hands-down delicious. Probably some of the best barbecue sandwiches I've eaten.

Before we get on with the recipe, have you entered the Conscious Box giveaway yet?
a Rafflecopter giveaway

Slowcooker Pulled Chicken in Brioche

Ingredients:

For the pulled chicken1 whole chicken
BBQ rub: equal parts salt, cumin, ground ginger, cayenne pepper, lemon pepper and crushed cardamom pods
Jack Daniel's BBQ sauce


All right, let's cook:
Mix the rub ingredients and rub it into the chicken.

Put the chicken in the slowcooker with nothing else. The chicken will produce its own juices.

Cover and cook on low for about 6 hours. Remove the chicken and allow to rest on a cutting board.

Set aside 1/2 of the juice. With the other half in the slowcooker, add the barbecue sauce.

Shred the chicken and return to the slowcooker. There should be enough liquid to and sauce to just cover it. If not, add a bit more of the cooking liquid. Switch it to the keep warm setting and let it simmer away until you're ready to serve up.

Spoon into buns and drizzle over any extra sauce if necessary. Be prepared for an amazing dish.
Slowcooker Pulled Chicken in Brioche

Gluten Free Slowcooker Cashew Chicken

Wednesday, May 15, 2013

Anyonita Nibbles: Slowcooker Cashew Chicken
Every now and then, I get invitations to various foodie events and parties down in London. Perks of the "job", I suppose. Just a few weeks ago, I was contacted about an amazing opportunity to attend a launch for a new bottle of Amoy Soy Sauce. Unfortunately, the timing wasn't right for me to arrange for someone to watch Callum and get down to London. Instead, the lovely rep I was working with, popped a parcel in the post containing a bottle of the soy sauce! Keeping the sauce company on its trip up north was a bottle of Heinz Tomato Ketchup with Sweet Chilli. Sweet. Chilli. Ketchup.


Needless to say, I was pretty excited about that parcel and the next time I made fries, I opened the bottle of ketchup. One dunk and a runny nose later, I realized the spice in that bottle was serious and not for the whimsical French fry in pool of ketchup scenario I'd envisioned. Reluctantly, I put the bottle back in the fridge and started coming up with a recipe that would allow me to tame the amount of spice while still getting the lovely flavor. After researching a few teriyaki style recipes, I combined the soy sauce and the ketchup and came up with this!

I made this when we had my mother-in-law here for company, so this recipe yields enough for three adults and one toddler. We all ate it quite happily and it's already been put on the menu for later in the month.

Tasty Tuesdays #10 + 10 Tempting Desserts and Cohosts!

Tuesday, May 14, 2013

Welcome to Tasty Tuesdays!
I'm excited that you're interested in sharing your delish dishes with the blogging community through my link party. Scroll down to see if you've been featured & if you have, don't forget to display a featured badge & help attract other bloggers.

Gluten Free No-Churn Vanilla Bean Ice Cream

Monday, May 13, 2013

This recipe was updated and is now available here.
Anyonita Nibbles: Smoothest Creamiest No Machine Vanilla Bean Ice Cream

Cohosting: My Favorite Posts Weekend Blog Party

Saturday, May 11, 2013

I'm co-hosting this fab party for 4 weeks! Be sure to stop by and visit our lovely host, Jessica's blog! Also, meet me co-hosts


Come back to The Wondering Brain tomorrow and enter a Conscious Box Giveaway! We are partnering up at 5 pm for a chance to win a free box. Start entering tomorrow with any of us! 


Are you ready to party? Before you begin, remember these simple rules:


  1. Link up your favorite posts. It doesn't matter which one, just make sure it's family friendly! 
  2. Follow your host (that's me! The Wondering Brain)
  3. Follow all 5 co-hosts: Lisa, Jackie, Anyonita, Marty, and Asha
  4. Leave a comment if you'd like them to follow you too
  5. Visit at least 3 other bloggers 
  6. Show them your blogger love too if you'd like them to follow 
  7. Remember, it's not a party unless you mingle, so mingle around and make some friends! 
  8. Take our beautiful badge and proudly display it on your side bar to encourage others to party with us! 

FavePost PartyBadge photo
blogbadge.jpg

Let the party begin! 


NOMINATE ME BiB 2013 FOOD
Please  vote for me!

We're so social! Why not connect with us?
Image Map