
How to Make Every Image in a Collage a Link
Written by: Anyonita Green on

One of the most annoying things about collages, though, is that there's never been an easy way to attach multiple links to them. So bloggers tend to default to having to place links beneath the collage either in clockwise manner or in correspondence with numbered photos in the collage.
But I'm going to show you a relatively simple method for making every image in a collage a link. It doesn't matter what your collage is of and it doesn't matter if each photo will be assigned a different link. Here's one easy way to make every image in your collage a fully-functioning, clickable link.

How to Make Every Image in a Collage a Link
Here is a five minute video on how to create a collage in PicMonkey, how to host the collage image on your Google Web Album and how to made each image into a clickable link:
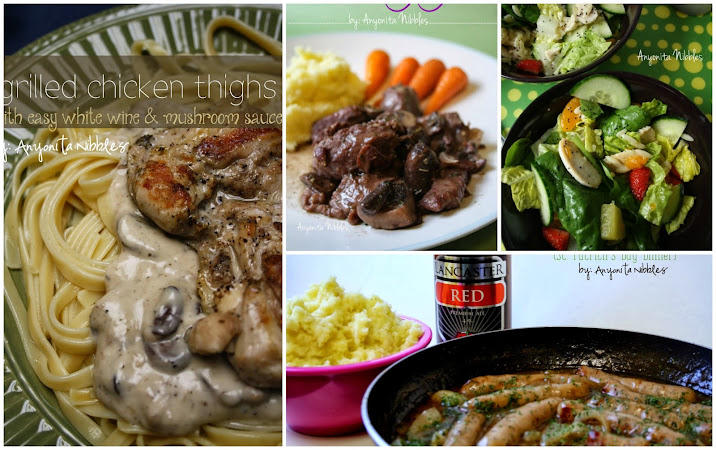
And here is the result of our video:
No time to watch the video? Here's the transcript:
"Hi, in this tutorial today, I'm going to show you how to make every image in a collage a link. Lots of bloggers use collages for showcasing features from link parties or as the main image of a roundup that they might do. And being able to click each image and go directly to the image source is really handy and it looks a lot tidier and neater than having links beneath the collage. So, I'm going to take you through the steps from creating a collage (we're going to use PicMonkey to do that) to hosting the collage image and we're going to use our Google Web Albums to do that and then, finally, I'm going to show how to make each image a clickable link.
Creating a Collage with PicMonkey
"So on Picmonkey.com, you go ahead and click the collage option and you just add the photos that you want to use. And for the purpose of this tutorial, we are going to create a collage around some recipes that you can find on Anyonita Nibbles. So all the photos that we're going to use open up over here on the left and we simply drag and drop them into place ... like this. And once we have our photos how we want them,we click "save" and save it to our computer.
Hosting the Collage Image Online with Google
"Next, we need to hose the image online. You can host on Facebook, in a private Facebook album, on Flickr or Photobucket. I prefer to use my Google Web Albums because everything stays central and I can put it in a private album as well and it's easy to find again. Okay, once you have uploaded your image, go ahead and right click on it and you want to get the actual image location or the image's URL. So "copy image location". And next we will head over to Image Maps.
Making Each Photo a Link with Image-Maps
"Now we are at image-maps.com and you want to paste in the URL and click "start mapping". Image Maps will bring up a little preview of the image and if you're sure that that's the one that you want to map, click "click to continue" ... and you've opened up the work desk.
Uh, you can close this [yellow bar at top of window]. And you right click and you want to "create rect" or create rectangle. Go ahead and move this box [image map box] out of your way so you can see the whole image. And then you simply drag and resize the boxes as needed to fit the photo.
Once you've done that, you copy and paste the link that you want that photo to go. Right there, where it says "map URL" paste the link we want. And under "event" under "target" if you change it to "_blank", all of your links will open up in a new window or tab.
And to continue, you just do the exact same thing again: right click, create rectangle, draw your shape and then here ["map URL"] you'll paste in your link. I'll go ahead and finish this up. Okay, once your collage is finished, you right click again and choose "get code".
You click the second tab that says "HTML code" and then you scroll down until you see the HTML code and you copy and paste. And here's your finished product! And if you click on an image you'll be taking--you'll be taken to the post! And that's it. Now, if you follow this tutorial, leave me a link in the comments to your collage, I'd love to come take a look at it! Thanks!"
If you follow this tutorial, please leave me a link and show off the fabulous collage(s) you make! I'd love to take a look at them!
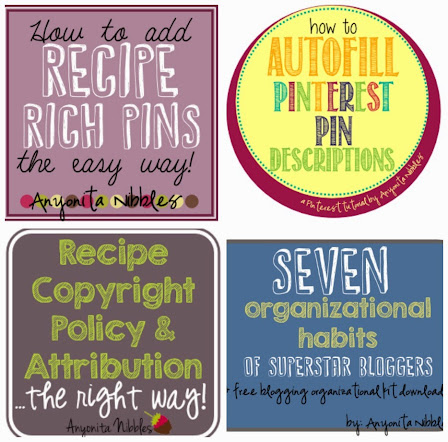
Here are more blogging tutorials you may find helpful:


This is super helpful, Anyonita! Thanks so much for sharing this tutorial.
ReplyDeleteWow..this is great stuff. I enjoy seeing all the stuff you cook up but your a pretty good hand when it comes to the "techie stuff". Thanks so much for sharing all your great ideas.
ReplyDeleteVery cool -I have been wondering about this. I know many that use it for their about me image they put in their sidebar but I had yet to figure out how to do it myself. Now I know- thank you
ReplyDeleteI will try this with my next weekly menu collage! Thanks
ReplyDeleteI just learned how to do this too! Your tutorial explaining it is great!
ReplyDeleteGreat info, Anyonita! Thanks for sharing!
ReplyDeleteAnother thing I really need to get my head around. Thanks for telling us how. You are brilliant at this.
ReplyDeleteThanks Anyonita! Just followed your tutorial for our latest blog post.
ReplyDeleteThank you for this! This is wonderful :)
ReplyDeleteGreat tutorial and graphics as always. You're very good at this, thanks for sharing with everyone. :)
ReplyDeleteOh my gosh... I've been wanting to do this for such a long time, but all of the other tutorials I've read were too confusing. THANK YOU! This post has been Pinned!
ReplyDeleteWhoa! Love this!! always such great info Anyonita! thanks!
ReplyDeleteI am not afraid to try new techie things but often just don't know where to start, so this is so useful, thanks Anyonita. x
ReplyDeleteGreat post, I wondered how to do this in Pic Monkey!
ReplyDeleteI pinned this for sure! Awesome!
ReplyDeleteGreat tutorial! I've done this a few times before! Great job explaining!
ReplyDeleteI have started seeing collages where you can click on the individual pictures and I was wanting to know how to do this - especially for our features on the linky party!! Thanks so much. As always, you have done an excellent job of making an easy to follow tutorial! Stopping by from the What'd You Do this Weekend party.
ReplyDeleteThis is awesome - I can't wait to try it out!!!
ReplyDeleteGreat post, Anyonita. I've done this before and I've even posted them on my blog (such as a seo icon bar with links). For some reason, after a few months, the image stops working. (???) So I've had to remove them. Anyway, I'm pinning this!
ReplyDeleteThank you for sharing this at Brag About It Link Party on VMG206.
~ Megin of VMG206
Thank you, Megin! I wonder if it's because you were letting the site host the image for you? Or if you hosted the original image yourself like on Google Web Albums or Facebook, Flickr etc and removed it then that might happen, too. Also, if you resize the image you'd need to create another Image Map for it...Any of this sound like possibilities?
DeleteExtremely helpful tutorial. I "stumbled" this post.
ReplyDeleteThanks. I found you on the Party on the Porch blog hop. Pinned and checked out a bunch of your other blog helpfuls and followed you on Twitter and G+.
ReplyDeleteLea @ www.adropofthis.com
Anyonita,
ReplyDeleteI *think* I've done this right, though I'm not 100% sure. I love the idea of having a collage of recipes featuring different vegetables, that go to each recipe, so that when you pull, for example, beets out of the farm share box you've got options.
http://www.farmfreshfeasts.com/p/recipe-suggestions-by.html
Kristen, that looks amazing! :) I've left a comment on your page for you :)
DeleteThank you for the tutorial - I am so new at all this and need all the help I can get :)
ReplyDeleteHI Anyonita,
ReplyDeleteThanks for sharing this awesome tutorial! I've featured you on 'Do Tell Tuesday' over at www.aanikalouise.com :)
Have a great week!!
Aanika
Anyonita,
ReplyDeleteI'm blown away by how useful this technique is. Initially I was thinking recipe index, and thinking it would be a pain to update--but now I'm using this to share similar recipes at the end of a post. I posted an avocado feta hummus layered appetizer this morning, and made up a collage of other layered vegetable appetizers on my blog, mapped it, then inserted the code into all 6 of the posts that are in the collage. http://www.farmfreshfeasts.com/2014/04/avocado-feta-hummus-layered-vegetable.html
Thanks again!
Kirsten,
ReplyDeleteYou're right; it is so useful! I find myself using it multiple times a week! :) Funny you should mention the recipe index thing; I'm putting the finishing touches on something that you might be interested in! Keep your eyes peeled :) I'm off to check out that post!
Hello there Anyonita!
ReplyDeleteYou have the cutest lil voice! Ok, so I just watched your great tutorial! My question is, where in the blog post do you tell your readers that they can just click on the images instead of looking for the links below? Or do you put the links below the image as well? Also, do you know how people make those collages with all the things they like, but the background is all white?? Can you do that on Picmonkey? I tried on Photoshop and I am an idiot on Photoshop!
Thank you!!!
xox
Dawn
Hi Dawn, I normally just write "click each photo to be taken to the recipe" (or whatever the photos are) right beneath the image itself. If I make each photo in the collage clickable, I don't include the links again in the text or beneath the photo. Regarding your collage question, you'll want to use some software that enables you to remove the background from an image. I'm not sure PicMonkey allows you to do this, but you could try GIMP. Although, GIMP can be as technical as Photoshop. Once you have removed the background, simply save the image (preferably as a PNG) & then upload it to your collage creator! Let me know if I can help you in any way!
Deleteawesome! Thank you! Ok, so I am at the point in the collage process where it's all done and you say, "ok, now copy your code and paste" but I don't know where I'm pasting the large code lol. Sorry I'm such a newbie :(
ReplyDeleteHi Dawn,
DeleteNo worries! :) No need to apologize; you'll want to paste the code wherever you want it to appear. :) If you want it in a blog post, paste it in the HTML view instead of the Compose mode. Does that make sense?
This is fantastic, I have been so frustrated by my inability to include clickable collages and having to include an ugly list of links, I love this tutorial, thanks so much. I have now had a go and it works like a charm, loving this new technique, here is my first one, I edited an old post to remove all the ugly links and use the new clickable montage, Yippee.
ReplyDeleteHi Anyonita, I have been having a great time altering all my collage posts after reading your tutorial, so I have shared it this week on my blog as I think this is a real must read post for anyone who has an online business. http://craftartmess.blogspot.com.au/2014/05/a-super-how-to-tutorial-on-making.html
DeleteHi Rachel, I'm so glad to hear you're enjoying the image mapping I'm off to have a peek at your blog & see your collages in action! :D Thank you so much for sharing that link with me
DeleteI'm so sorry I know this was posted forever ago so I don't know if you'll see it... but for some reason the image links stop working as soon as I upload the collage to the page! I put it in "Interpret typed HTML" mode and then copy and pasted... the image showed up just fine yet the map itself didn't work. Just as a test I tried "adding HTML code" to the very bottom of the blog Homepage on Layout (obviously not where I want it because it's a huge picture) and there the links work just fine! Would you happen to know why it's doing this?
ReplyDeleteHi Katie,
DeleteSorry to hear you're struggling with this! Hopefully, I can help you get it sorted! We've got two options here, I think: first off, when you paste in the code, are you pasting it in the Compose View or the HTML view? You should be pasting it in the HTML view. To get there,click the HTML tab on the toolbar when you write your post.It's all the way on the left, right beneath your blog's name. Click that & then paste the HTML in the location you want it to appear.
That should sort it out. Let me know if it doesn't, then we can look at my second option, but I think that should do it. :)
Thanks for this fantastic tutorial! I used it to help me create a clickable collage of lunches for a post I was working on last week, I'm really pleased with how it turned out! Although I knew how to make collages, I didn't know how to add the individual links, but I've no doubt I'll be making many more like this in the future now!
ReplyDeleteHere's my first attempt: http://eatsamazing.co.uk/lunches/star-themed-lunch-and-yumbox-uk-special-offer-code
Hi Grace,
DeleteI'm delighted to hear that you found this helpful! I'm on my way to check out your collage now; it's so exciting seeing new collages!
Great! Great! Great Tutorial! This was exactly what I was looking for to clean up my tutorial page. I've been dying to figure out how to add links to collages!!! Thanks so much for sharing. So excited to get started!!!!
ReplyDeleteAnyonita - this is one of the most helpful posts I've seen in a long time! Thanks so much for sharing this tip, I'll be sharing your post with everyone!
ReplyDeleteHere's mine! thank you anoynita for doing this - I almost cried I was so happy to finally find help after hours of searching! http://fitfabandhomeschool.blogspot.com/p/r.html
ReplyDeleteThanks for sharing!! I cant express how elated I was when I came across your post!
ReplyDeleteThank you so much for posting this tutorial. It's my first time doing image mapping and your tutorial is so easy to understand and my collage can be found at my blog, www.cleabanal.com
ReplyDeleteThis comment has been removed by the author.
ReplyDeletethis is really helpful
ReplyDeleteI just tried this! Thanks so much for the tutorial Anoynita! You made it so clear and easy to follow, the video really helps the text!! Here's mine: http://ourlifeinaclick.blogspot.com/2016/03/st-patricks-day-round-up-2016.html
ReplyDeleteThis was so helpful thank you!
ReplyDeleteThank you so much for the tutorial! This was a life saver!
ReplyDeletehttp://twomakesapear.blogspot.com/2017/05/mothers-day-gift-guide_88.html