Tostadas Rellenas con Carne Adobada or Stuffed Tostadas with Marinated Beef

Monday, April 15, 2013

Tostadas Rellenas con Carne Adobada from Anyonita-nibbles.com
200 Easy Mexican Recipes by Kelley Cleary Coffeen
 One of the best things about growing up in North Carolina is all of the authentic Mexican food literally on my doorstep.  North Carolina (and much of the south) is inundated with Mexican restaurants and I love it.

Moving to the UK, one of the things I miss most is Mexican food. Actual Mexican food that tastes like it should and that hasn't been altered to be more accepting of the European palette. It's a tough thing to come by, but I've managed to sniff out one such burrito stand in a food market here in Manchester.

Unfortunately, I can't always get to the burrito stand and have to make do with my own Mexican dishes.

You'll understand why I was chuffed to open the post last week and find a new cookbook waiting for my review! This recipe has been adapted from that book, 200 Easy Mexican Recipes to fit in with what's available in the UK.


Tostadas shells waiting to be filled
Ingredients:
For the tostada rellenas con carne adobada

10 8-inch (15 cm) flour tortillas
Cooking spray
Shredded lettuce
Tomato, seeded and diced
Shredded Cheese 
     Carne Adobada:
1 tsp dried oregano
1 tsp dried cumin
250g beef or pork mince
water
      Red Enchilada sauce:
 a few twists of a chili grinder
 2 tbsp plain flour
 3 garlic cloves, minced
 3 tbsp coriander leaf
 3 tbsp sour cream
 4 tbsp sunflower oil
 4 tbsp sugar
 5 cubes Dorot frozen chopped chilli
a handful frozen bell peppers
 water
 salt and pepper


First, a few tips:
There are a lot of processes involved in this recipe (which I didn't realize until I started making it) so I suggest you stick to this general order and only make this dish when you have ample time. Another tip for successful execution would be to mis en place or get all your ingredients and tools together and have them laid out before you start cooking.  You won't want to be dashing around the kitchen, trust me!

Stuffed tostadas with marinate beef cups
All right, let's cook:
For the red enchilada sauce, tumble the frozen chilli cubes and frozen bell peppers into the belly of a blender and pour in just enough water to cover them. Pulse until the cubes have broken up. In a large skillet, heat 2 tbsp of the sunflower oil over a medium heat.

Add the chilli and pepper puree along with the minced garlic. Allow to come to a gentle boil. Reduce the heat and simmer, stirring occasionally for about 8 minutes. Leave on the stove but reduce the heat all the way down to the lowest possible setting while still being on.

In a small saucepan, heat the remaining 2 tbsps of sunflower oil over a medium heat. Once heated, gradually stir in the flour, stirring all the while to form a roux. Increase the heat on the chilli and pepper sauce to medium. Stir bit by bit into the chilli and pepper sauce. Continue to stir until smooth and thick. It should take about 6 minutes. Season with salt and pepper and the coriander leaf. Remove from the heat and allow to cool. Once cooled, have a taste and if it's too spicy for you family, stir in sugar and sour cream until it's to your liking. Warning: this enchilada sauce is fiery hot!

Two made and one unmade tostada rellena con carne adobada
Preheat your oven to 200C (400F).

For the carne adobada, put the mince into a saucepan and add just enough water to cover it. Bring to the boil over high heat and boil, stirring occasionally, until the water and the meat juices have evaporated. Takes about 20 minutes.

For the tostadas, pop the tortillas in their plastic wrap into the microwave for 15 to 20 seconds. Tortilla should be moist and pliable but not too hat to handle. Remove and spray both sides of each tortilla with cooking spray. 

Arrange each tortilla into a ramekin or small souffle dish. Use your fingers to fold and mold the edges into a curvy shape. If making for children, cut the tortilla in half and shape into a cupcake cases instead of a ramekin.

Callum enjoying his non-spicy tostada rellena con carne adobada
Place the ramekins and/or cupcake case on a baking tray and into the oven until they are crispy and brown. About 10 minutes. Allow to cool in the bowls before removing and placing on a plate.

Go back to the carne adobada. The water and juice should be evaporated by now. If serving children, remove some of the meat from the pan and set aside before adding the sauce. Add the red enchilada sauce along with a few sprinkles of shredded cheese to the meat along with the oregano and cumin. Mix well to ensure the sauce is combined with the meat. Spoon into the waiting tostada shells and top with lettuce, cheese and tomato. Serve with additional sour cream.

A plate of stuffed tostadas with marinated beef and sour cream

This meal was a huge hit with my family. Callum, my 15 1/2 month old son, really enjoyed his little tostada as well. If you're serving these to children, be sure to remove some of the mince from the pot for them before you add the fiery enchilada sauce.

Gluten Free Slowcooker Chicken Stroganoff with Conchiglie

Friday, April 12, 2013

Slowcooker chicken stroganoff with conchiglie
There's a pin floating around Pinterest for 77 Healthy Slowcooker meals. Intrigued and half expecting to find yet more varieties of slowcooker favorites (taco soup! casserole! brownies!) I clicked it. I was pleasantly surprised that there were so many interesting recipes for things I had never considered putting in a slow cooker or twists on favorite dishes. I spotted this one, well a variation and thought I'd have a go.

I've had beef stroganoff in the past and it's lovely when it's homemade. But can be a bit ... vom-worthy if you happen to get slop posing as stroganoff from a canteen or cafeteria. I've also had mushroom stroganoff, which, like its beefy cousin is much the same--hit or miss. This one, though is always a hit. A bang on hit. So much that it's already on the menu for May.

I paired it with conchiglie pasta shells because I love the way the wells hold the sauce, but you could pair it with any pasta or noodles you want. Stroganoff always works well with pappardelle. Or you could use rice or even try orzo or couscous. Or pearl barley. That might be interesting.

I've got a slow cooker tip for you: do you find that when you toss in cubes of chicken in the slow cooker it always seems to dry out? Despite swimming in liquid? That always happens to me, anyway. If you leave the chicken breast whole and break them up just before serving, you'll have juicy chicken instead of fibrous lumps.

Gluten Free Cherry and Pear Crumble Smoothie with Cinnamon + Ebook

Thursday, April 11, 2013

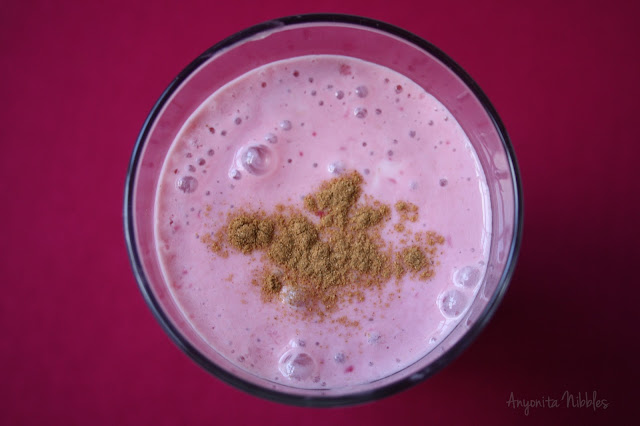
Cherry and Pear Crumble Smoothie with Cinnamon

All my life, I've been a fruit addict. I love fresh fruit, cooked fruit, frozen fruit, pureed fruit, poached fruit, tinned fruit, strained fruit ... see where I'm going? Desserts with fruit in them are even better. That's where this smoothie comes in. I swear, y'all, it's just like eating a dessert crumble. But without the worry about the number of calories. Who doesn't want that?

Cherry and Pear Crumble Smoothie with Cinnamon

Ingredients:
For the cherry and pear crumble

1/2 pear skin-on and diced
1/2 cup milk
1 pot Activia pear yogurt
1 handful frozen cherries
1 tsp cinnamon
1 tsp honey
2 tbsps gluten free rolled oats
2 frozen banana discs


All right, let's blitz:

Blitz the oats on their own in the blender.
Add the milk, yogurt and cinnamon.
Tumble in the fresh pear and frozen cherries.
Drizzle the honey over top and blitz again until smooth.
Serve with a further sprinkling of cinnamon to swirl in before drinking.
Cherry and Pear Crumble Smoothie with Cinnamon

Did you enjoy this recipe? You can download it and 13 other breakfast smoothies for free from my new ebook, 14 Brekkie Smoothies! In the ebook, you'll find tips and advice on blending perfect smoothies every time plus information on how to develop your own smoothie recipes. Download it today!


Link Party: Tasty Tuesdays #5 Plus Features

Tuesday, April 9, 2013

Welcome to Tasty Tuesdays!
I'm excited that you're interested in sharing your delish dishes with the blogging community through my link party. Let's see how many newbies we get this week & how many past partiers return!

As always, I'd love it if you helped to spread the word about this party by inviting your blogging buddies to participate. Don't forget to grab a participator's button to display on your blog where you see fit. Also, if you've been featured, swipe a snazzy button for your blog/newsletter:

Grab button for Anyonita Nibbles

Grab button for Anyonita Nibbles


Featured from last week's party
Here are the top three clicked on/commented on links! Well done!

S'more Pudding Cookies
Oh my nom! Seriously, can't stop drooling! I miss s'mores. Can't really make them here in the UK because we don't have graham crackers. (And no, digestive biscuits are not the same thing!)

Salted Cod
I love salt cod. This stew looks fab!

Bubble Up Pizza Casserole
I love the idea of this! I think Callum would really love it too!

A few rules of the party
  1. Follow Anyonita Nibbles socially (however you'd like) and let me know so I can do the same in return!
  2. Visit other links in the party. Leave a comment stating that you stopped by. (We all love to read comments, so share the love!)
  3. Spread the word; grab a participator's button and display it on your blog.
  4. Link to your recipes--no giveways or promos, please.
  5. As a participant, you acknowledge that photos from the post you link may be distributed as a part of the Tasty Tuesdays Feature and/or across my social media platforms. If this is the case, all photos will be credited back to your sites and posts and credit will be given.

All right, here we go, party people!


Gluten Free Cherry and Cauliflower Smoothie

Monday, April 8, 2013

Cheery Cherry and Cauliflower Smoothie from Anyonita-Nibbles


Eat Seasonably Campaign
In an effort to save money grocery shopping and to highlight the importance of eating with seasons, I've decided to launch a new series called "Eat Seasonably."  Each month, I'll feature unique recipes for seasonal produce. Okay, here we go, eating seasonably, getting the most out of our produce and saving money!


Cherry and Cauliflower Smoothie
Ingredients:
For the cherry and cauliflower smoothie
1/2 banana
1/2 cup semi-skimmed milk
1 pot of  0% cherry yogurt
1 tsp honey
2 small to medium sized cauliflower florets
handful of frozen cherries


All right, let's cook:
For the smoothie, begin by pouring the milk into your blender. Next, add the florets, banana, cherries and yogurt. Drizzle over the honey and blitz until smooth and frothy.

Cherry and Cauliflower smoothie

Cake and Bake Show Manchester + Features

Sunday, April 7, 2013

Cakes at the Cake and Bake Show in Manchester
Yesterday, I visited the Cake and Bake Show in Manchester. It was phenomenal! There were loads of lovely stalls with cakes, pies, quiches, meringues et cetera everywhere. There was so much to do, so much to eat and so much to learn.

On the Cake walk at the Cake and Bake Show in Manchester
I went on my own, took my camera and got stuck in having a good nosey round. A lot of the stalls catered to the cupcake industry and I was able to find loads of cupcake decorating bits and bobs that I'm going to incorporate in my macaron business.

Speaking of macarons, I went back to the venue yesterday evening for a quick demo in making macarons using the Italian method from Reshmi at Anges de Sucre. I make macarons using the French method, but I still learned plenty of tips and it was an informative session! Reshmi was a fabulous demonstrator. Next time I'm in London, I'll have to pop into her shop.

I mentioned I learned a lot at the show yesterday, and I did. I sat in on two hour-long demonstrations, one with Peter Sidwell baking up tasty bread and answering questions from the floor and one with Eric Lanlard, who made a stunning dessert from his latest cookbook. Eric also gave some pointers on whipping egg whites that I put into practice last night and produced some of the best macarons I've made to date. Here are a few more photos from the day. I didn't get to take too many as there was so much to do and so many people about, but I did enjoy it! The next festival I'll be blogging about is the Foodies Festival at Tatton Park. If you're in the Manchester area, tag along! It's going to be a great day! Also, ask me how you can get your mitts on a pair of discount tickets!
Peter Sidwell at Cake and Bake Show Manchester
Eric Lanlard at Cake and Bake Show Manchester


 Features
Three quick things about features and Anyonita Nibbles:
  1. I've been featured
    Did you know you can see where I've been featured on my snazzy Media page? Why not go ahead and have a look? You can click the links to be taken to my featured post. Or look out for features badges on relevant entries.
              Note: There are no links for the etail feature as it hasn't gone live yet and the Best Blog Recipes feature will be disclosed on Monday along with a little surprise!
  2. I'm looking for features
    If you clicked that link, then you might have noticed that I'm looking for people to feature in the form of guest posts! If you'd like to share one of your recipes with a new audience, then get in touch! For criteria, head on over to the Media page!
  3. I want to be featured again
    I've been bitten by the features bug and now I want more! I'm looking to feature recipes on other blogs! If you're accepting guest posts or would like me to create something/share something I've already posted, then let me know! If you choose a previously published post, I'll rewrite it so it's different from what's here. I've also got a backlog of images for each post I write, just for guest posting opportunities. Let me know!
Merinuges from the Cake and Bake Show in Manchester

Gluten Free Grilled Corn, Prawn & Chorizo Salad with Cider Vinaigrette

Friday, April 5, 2013

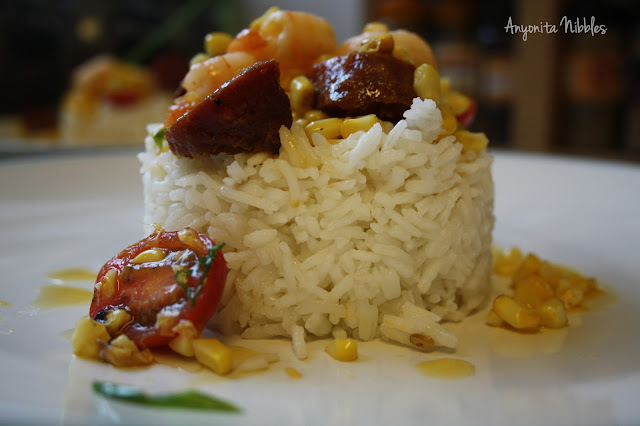
Grilled Prawn, Corn & Chorizo Salad with Cider Vinaigrette
Looking at that plate of food and peeking outside my living room window at my laundry hanging on the line in the rare Manchester sun, you'd think Spring was around the corner! It seems as if this winter has dragged and dragged and dragged, hasn't it? Around the globe, the Northern Hemisphere in general has been much colder, I've heard. I don't know about where you are, but temperatures are expected to reach 51 this weekend in Manchester! Ah, silver linings.

In an attempt to shake the wintry funk, I put together this paella-inspired salad adapted from an Elizabeth Karmel recipe. I think it turned out quite well, the boiled rice was a much-needed neutral accompaniment as there are so many flavors competing in this dish. I particularly enjoyed the smoky paprika infused vinaigrette, although it does take a bit of time to prepare.

This isn't one of those quick dinners, I'll tell you up front. But it is definitely worth the time and effort it calls for. I was planning on saving this one for Cinco de Mayo, but while still eating, my husband asked, "When are we having this again?" Guess this one needs to be shared quickly and prepared again!

A plate of grilled corn, prawn & chorizo salad
Ingredients:
For the vinaigrette:
1/3 cup cider vinegar
2/3 cup extra virgin olive oil
1 tbsp smoked paprika
3 large garlic cloves, minced
salt
black pepper

For the salad:
1/2 cup plum tomatoes, halved
1 cup spring onions 
2 large ears of corn
2 cups raw, deveined prawns
225g chorizo sausage
extra virgin olive oil


All right, let's cook:

For the vinaigrette, combine the olive oil and minced garlic in a small saucepan over a medium heat. Cook about 5 minutes until the garlic begins to brown, but do not let it burn. Add  a pinch of salt and stir to dissolve it.

Remove from the heat and allow to cool for about 5 minutes before adding the paprika to the oil and leaving to infuse 10 minutes. Strain the olive oil into another container and set aside.

Put the vinegar in a separate bowl, season with salt and pepper and whisk to combine. Slowly add the paprika oil, whisking to combine. Cover and set aside.

For the salad, brush the corn with extra virgin olive oil, salt and arrange on a grill pan along with the prawns and chorizo. Place all in the grill/broiler and cook for five minutes. Remove the prawns and chorizo and place in a bowl. Turn the corn and return to the grill for a further five minutes.

Once cooked, use a nice to remove the kernels from the cobs. Put the kernels in a bowl and add half of the prepared vinaigrette. Toss. Stir in the spring onions, prawns and chorizo. Season if necessary. Serve with boiled basmati rice.
Grilled corn, prawn and chorizo salad with cider vinaigrette


Sweet Bell Pepper Poppers with Butter Chicken and Crushed Cannellini Rice

Thursday, April 4, 2013

butter chicken with cannellini rice and bell pepper poppers


sweet bell pepper poppers
I mentioned on my Tame Dragon Chicken post that I love spicy food but my husband's a bit more adverse to it. Naturally, I love jalapeno poppers but my husband could live without them, although he has been known to eat the odd one or two. (He's more a fan of the ones you can get from UK Burger Kings--a lot milder and heavy on the cheese.)

The idea for these sweet bell pepper poppers came from my love for jalapeno poppers, but I wanted something that my husband would eat as well. Plus, while I was making the butter chicken also featured in this recipe, I noticed that one leftover bell pepper was on the last legs of its life and needed rescuing.

The coating I used for these comes from the technique I learned from Marcello Tully's Rice Krispies fish fingers recipe. The dipping sauce is simply ranch dressing from a bottle. As this was a last minute accompaniment, I hadn't anticipated making a dipping sauce for it, but I think the ranch works well. I'm telling you, just make these bell pepper poppers and you'll fall in love with them! They're slightly sweet with a satisfying crunch from the Rice Krispies treats and when dunked in the ranch, are simply irresistible. They'd be great as an appetizer or snack or even as a crispy component of a meal as I've done.

 Ingredients:
For the sweet bell pepper poppers
1/3 cup Rice Krispies cereal
1 bell pepper, deseeded and sliced
1 egg
1 cup of plain flour
1 tbsp sesame seeds
Sunflower oil for frying
Ranch dressing for serving

For the butter chicken and crushed cannellini rice 
1 can (220g) cannellini beans in salted water
1 1/2 cups basmati rice
2 large chicken breasts
2 tbsp butter plus more for serving
3 cups water
salt and pepper

All right, let's cook:
Heat an inch or two of oil in a saucepan or fryer.
Put the flour in a bowl and set aside.
Beat the egg in a separate bowl and set aside.
Put the Rice Krispies in a bowl and lightly crush. Add the sesame seeds and set aside.
Dredge each piece of bell pepper through the flour first, then the egg and then the cereal and seed mix. Set aside.
Once all the pieces of have been coated, fry about 90 seconds or until golden brown. Place on a paper towel-lined plate to drain the excess oil off.
Melt the butter in a frying pan and when foaming add the chicken breast and cook through.
Prepare the rice by placing all of it and the water into a saucepan. Place over a high heat until boiling. Once boiling, reduce the heat and check for holes to appear on the surface of the rice. When the holes appear, add the cannellini beans, cover the rice and turn off the heat. Your rice will cook perfectly and will not stick to the pan.


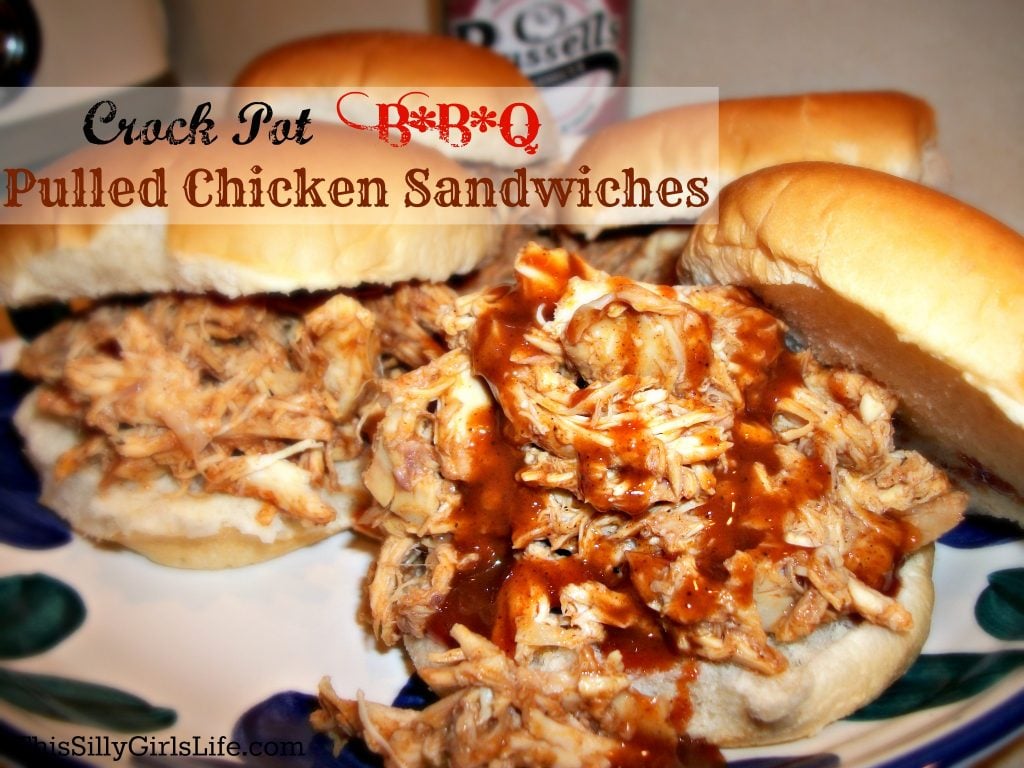
Crock Pot BBQ Pulled Chicken Sandwiches from This Silly Girl's Life

Wednesday, April 3, 2013


Crock Pot BBQ Pulled Chicken Sandwiches

Today, we're welcoming our very first guest poster! The fabulous Dana from This Silly Girl's Life is bringing us a fantastic recipe for slow cooker bbq pulled chicken sandwiches. The day Dana sent this recipe to me, I was in a pinch and needed something quick to prepare for my family and made this and can say: it is so tasty! I'll be posting my review of her recipe a little bit later. 

Here's what Dana has to say:
"I LOVE my slow cooker. What I like to do on my day off is assemble some dishes that I can throw in that bad baby and off to work I go! That is where this recipe for Crock Pot BBQ Pulled Chicken Sandwiches came in. These are finger lickin' good, literally ya'll! This is probably the easiest crock pot recipe I have ever made! This is another one going in the rotation ... trust me.

This recipe made 6 sandwiches for my hubby and I but that is only because we love to stuff our faces we have a healthy appetite. If you are more conservative with your portions, you will easily get 8 to 10 sammies out of this recipe. But, if you go a little over board like we do sometimes, I don't judge."


Ingredients:
For the crock pot BBQ pulled chicken sandwiches

1                Whole Chicken

2-3tbsp       BBQ Rub (I used Bone Suckin' Sauce Seasoning & Rub*)

1/2-1 Cup    BBQ Sauce (I used Russell's sauce* from the restaurant in Chicago, I suggest using a thinner sauce to get a good even coating)

Hamburger Buns

*Anyonita says: For my UK friends, my review of this recipe will include alternatives for both Bone Suckin' Sauce Seasoning and Rub and Russell's BBQ sauce. 


All right, let's cook:

All you do is sprinkle the chicken with the seasoning and rub it all over. Under the skin even. To do this just separate the skin from the meat by placing your hand under the skin and gently push your hand around until the skin separates. 

Place it in your crock pot breast side down with nothing else, no liquid, nada. 

Cover, place on low heat and let it go to town. Ours cooked for about 9ish hours.  You will see it produces a lot of natural juice.

 Remove the chicken and save about 1/4 of the liquid. Discard the remaining liquid. 
Shred the chicken discarding the bones and skin. Place the shredded chicken back in the slow cooker on the "keep warm" setting. 
Pour the liquid over the meat and add the BBQ sauce little by little until it is sauced how you like it. Cover the pot. Use this time to finish any sides you want with it. 
Place on hamburger buns and drizzle with more sauce if you'd like. This is so unbelievably tender you'll wonder why you never thought of it!


Dana is the woman behind the blog This Silly Girl's Life. Writing about food is her first passion but shares outfit posts and silly ramblings as well. She lives in Florida with her newly wed Hubby and four fur babies.

Thank you so much for the post, Dana! This post originally appeared here on Dana's blog. Be sure to stop by and show her some love! I'm currently accepting guest posts, so if you'd like to gain more exposure for your blog, be sure to get in touch and we'll get something sorted.

Link Party: Tasty Tuesday #4 Plus Features

Tuesday, April 2, 2013

Welcome to Tasty Tuesdays!
I'm excited that you're interested in sharing your delish dishes with the blogging community through my link party. While last week's party was a little on the small side, I'm hoping this week's party is going to be a little bigger! Either way, I'm sure we'll have fun peeking around new blogs and taking a look at new recipes. 
As always, I'd love it if you helped to spread the word about this party by inviting your blogging buddies to participate. Don't forget to grab a participator's button to display on your blog where you see fit. Also, if you've been featured, swipe a snazzy button from here for your blog/newsletter.

We've got two new party participants on Tasty Tuesday! A very warm welcome and a huge thank you for participating to JibberJabberUK & CourtingContentment! Be sure to keep spreading the word, guys, so we can see this party grow! 

Featured from last week's party
Here are the top three clicked on/commented on links! Well done!

Anyone else feel the urge to lick their screen? This look divine!

 
I've got some leftover lemons to use up and can't wait to try this!

This one was a family favorite, despite it's lack of heat!

A few rules of the party
  1. Follow Anyonita Nibbles socially (however you'd like) and let me know so I can do the same in return!
  2. Visit other links in the party. Leave a comment stating that you stopped by. (We all love to read comments, so share the love!)
  3. Spread the word; grab a participator's button and display it on your blog.
  4. Link to your recipes--no giveways or promos, please.
  5. As a participant, you acknowledge that photos from the post you link may be distributed as a part of the Tasty Tuesdays Feature and/or across my social media platforms. If this is the case, all photos will be credited back to your sites and posts and credit will be given.

All right, here we go, party people!