Gluten Free Skinny Honey Plum Fool

Thursday, February 28, 2013

Skinny honey plum fool || Anyonita Nibbles
I'll tell you up front the most difficult thing about this dessert: only eating one. It's so moreish and yum, it's hard to believe it's a tummy-conscious recipe. Although I fear, saying it's a recipe is a bit cheeky, because it's not much more taxing than piling ingredients into a dish. But when did simplicity stop something from being yummy? The fact that you could whip this up in less than five minutes after a long day just adds to the perks, in my book.

The star of this recipe is what's sprinkled over top--an unbelievably tasty honey, crushed honeycomb, sweet spices and bee pollen(!!!) mix compliments of the good people at My Secret Kitchen. I must give credit where it's due, the idea of combining this with tasty mix with plums came straight from the creators. But I'm certainly interested in scattering this sweet dust over other dishes too.


greek yogurt, plums, honeycomb, bee pollen, honey, skinny honey plum fool

Ingredients:
For the skinny fool
1 ripe plum, 2 if they're tiny, pitted and diced
2 to 3 tbsp non-fat Greek yogurt
1tbsp honey
1/2 tbsp My Secret Kitchen Secret Honeycomb Spices


All right, let's compile:
Gingerly pile the diced plum into the bottom of a glass.

(I used a red wine glass because it has a wide mouth and until we restock the kitchen from the Great Flood of 2012, I'm short on clear dishes!)

Gently spoon in a quenelle or dollop of Greek yogurt.

Drizzle the honey over top and scatter on a few sprinkles of the secret spices.

Commend yourself on your stunning, healthy dessert. (Optional, but highly recommended!)


greek yogurt, plums, honeycomb, bee pollen, honey

Skinny chicken & spinach curry

Tuesday, February 26, 2013

This recipe has been updated and made gluten free and is available here: gluten free cinnamon and spinach chicken curry recipe

Anyonita Nibbles||Skinny chicken & spinach curry with orzo

Gluten Free Healthy Tropical Cereal Smoothie

Friday, February 22, 2013


smoothie, tropical smoothie, healthy drinks, Pinterest smoothies, pineapple, mango, Special K cereal, cereal, milk, ice, honey
When you're busy, there's nothing better than something you can slip down while still getting on with your work. That's what I love most about smoothies. Add to that the fact that they're an easy peasy vehicle for sneaking in some extra fruits and veggies and they're absolutely perfect! This particular smoothie was created as a breakfast smoothie for my husband and he loved it. It's energizing, full of zing and tastes great. It's also packed with vitamins (A, B, B-12, B-6, C, D, E), protein and iron.

tropical smoothie: pineapple, mango Activia full fat yogurt, milk, ice, honey, banana
Ingredients:
For the smoothie
a few chunks of fresh pineapple
1/4 cup semi-skimmed milk
1/2 ripe banana
1 pot (125g) full fat mango yogurt
1 tbsp honey
2tbsp gluten free corn flakes breakfast cereal
3 ice cubes


All right, let's cook:
For the smoothie, toss all ingredients into a blender and whizz until your desired consistency and texture is reached. You may need to adjust the components to suit your individual tastes.

Gluten Free Creamy Slow Cooker Pot Roast

Wednesday, February 20, 2013

This classic Southern American pot roast made in the slow cooker has a creamy mushroom soup base for tons of depth!
Creamy Slow Cooker Pot Roast Recipe from www.anyonita-nibbles.com
Feeds 2 adults; 1 toddler with leftovers 

Growing up in the south in America, Sundays were about two things: church followed by a big Sunday dinner. Usually that dinner consisted of a mountain of fried chicken with mashed potatoes, slow-cooked green beans and cornbread or (my favorite) pot roast with a big helping of rice and gravy.

While looking for inspiration for this recipe, I concluded that pot roast's most important feature, its sauce, is usually made one of two ways: thin and meaty like a proper gravy or thick and creamy like a good stew base. I've gone for the second option--the gravy is thick with cream of mushroom soup, slightly earthy and certainly moreish.

The next day, with all that leftover pot roast, we forked the shredded beef onto bread for the best warm leftover sandwiches I've had in a while. This one is definitely a family favorite; I think we'll be having it once a month.

Gluten Free Oaty Breakfast Smoothie

Tuesday, February 19, 2013

healthy oaty breakfast smoothie--7 ingredients
In an effort to be more healthy (and to use up some fruit before it expired!), I decided to try my hand at making a smoothie. I've owned a blender for years but have never used it to make a smoothie--it usually gets pulled from the cupboard when the daiquiri or margarita urge hits or for smoothing out soups!

While I'd never made one, I've always been an avid smoothie drinker, taking the approach that the professional baristas at smoothie bars could whip up a tasty, healthy treat much better than I could, what with their energy shots and immune boosters. I'll happily report that that's not the case! Even still bleary-eyed at 10 to 7 this morning, I managed this tasty drink. And scored some photos too!

Ingredients:
For the smoothie
1/3 of a cucumber, seeds removed
1/2 cup semi-skimmed milk
1 banana
3 good-sized strawberries
3 tbsp gluten free rolled oats
4 tbsp fat free Greek yogurt
4 tbsp honey
4 ice cubes

All right, let's blend:
Blitz the oats in a blender until well ground, without making them powdery. Next, tumble in the rest of the ingredients in any order that strikes your fancy. Blitz, give it a taste and adjust any ingredients as necessary. Blitz again until smooth & enjoy!

A few notes:
  • This isn't a Slimming World recipe, but it is Slimming World friendly. In fact, I think you'd struggle to find a diet that didn't consider this a good option for breakfast as it's packed full of fruit and veg. 
  • This quick recipe was a big hit with my whole family-even my toddler loved it & I ended up making his porridge with it for his breakfast. It doesn't get any better than that, does it?


Gluten Free Skinny Slow Cooker Turkey Burgers with Carrot & Leek Slaw

Monday, February 18, 2013


anyonita nibbles||skinny slow cooker turkey burgers with carrot & leek slaw
How to provide healthy meals for your planning while still having time to spend with them is the age-old mommy conundrum, isn't it? In an effort to curtail this and satisfy my Type A personality by doing both (shock! horror!), I've decided to rekindle my love affair with my slow cooker.

Before I had kids, I was one of those carefree cooks, whipping together adventurous plates of food after work, letting the dishes pile in the sink, knowing I'd have hours to spare to tidy them. Before, my slow cooker was one of those seasonal items, that I'd pull from the cupboard around the same time I rescued my scarves and winter coat. Now? Pfft. I would love to have an hour to spare to do anything! And my slow cooker has a permanent home on my counter top.

anyonita nibbles|| healthy slow cooker recipes
Ingredients:
For the burgers
1 pack turkey mince
2 frozen garlic cubes (or cloves)
Cooking spray
1 cup shredded low-fat cheese
3 tbsp semi-skimmed milk
1 bell pepper, diced
1 onion, diced
salt and pepper
For the slaw
2 medium-sized carrots, peeled
1 leek, white & light green part
3 tbsp lemon mayonnaise
2 tsp mustard powder
salt and pepper
a couple pinches of caster sugar

All right, let's cook!
For the burgers, brown the mince along with some seasonings and the garlic. I added in about a teaspoon or so of garlic granules as well as the frozen garlic cubes. Spray the crock pot with the cooking spray and add the mince to the pot.
Cover the mince with half of the shredded cheese. Tumble in the peppers and onions and milk. Cook on low for six hours. Halfway through cooking, add in more cheese and a knob of butter (optional). If you allow it to cook without stirring, you'll start to get a lovely crunchy crust around the edges.

For the slaw, slice your carrots and leek into thin batons. Cover the leek batons with cold water and allow them to soak for about 10 minutes to help them firm up. Combine the carrots, drained and dried leeks with the mayonnaise, mustard powder, sugar and seasonings. Continue tasting and adjusting the amounts of mayonnaise, mustard, sugar and seasoning until it tastes how you want it to. Cover in cling film and let rest in a fridge for at least an hour. I made mine halfway through the burgers cooking and it was lovely and marinated by dinnertime.


Serve on your favorite burger bun (floured wholemeal burger buns used in photo). Spoon the mince on the bottom bun and top with slaw. Served with rosemary oven wedges in photos. 

anyonita nibbles|| easy recipes, turkey, healthy, potatoes, carrots, leeks

Gluten Free Creamy Chive and Basil Pesto with Linguine

Wednesday, February 13, 2013

pesto, basil pesto, chives, chive pesto, chive and basil pesto, healthy, homemade
Pasta with a fresh pesto sauce is a dinner that's hard to beat in my house. We're pasta mad here--from fusili to lumache, ravioli to linguine, we love it.

And I'm always looking for new ways to liven it up, because spaghetti bolognese just gets so boring! This dish is simple: big bowl of linguine with trimmed green beans tossed in and saturated with a moreish creamy pesto.

But not just any pesto, this pesto has a kick of garlic chives and lemon pepper. And to really make it sing? A hearty combo of grated and soft cheese.

I was impressed with how quick it was to whip up. It was my first homemade pesto attempt and it came together easily. In fact, this whole meal from pantry to table takes about 10 minutes. Fifteen if you have to keep running into the living room to disentangle a mischievous toddler!


You'll Need:
Gluten Free Linguine
Garlic Chives
Fresh Basil
Parmesan cheese, grated
Fresh green beans
Cream cheese
Chicken stock
Salt and Pepper

Alright, let's cook:
Cook the pasta until desired doneness, tossing in the green beans for the remaining 3 minutes if you like them a bit more al dente or 6 if you prefer a mushier bean.

While that's bubbling away, get on with your pesto by placing the basil and garlic chives in a food processor. Go ahead and add in the parmesan, garlic granules, salt and lemon pepper. Blitz this until it is a fine crumb. Add the soft cheese and stock and continue to blitz until creamy. Taste season, repeat the blitzing if any big lumps occur.

By now, your pasta should be ready to drain. Do that. Stir in the pesto and toss it to give it a good mix. I'd suggest serving it with a good garlic bread. And if you're not keen on just veggies, tossing a few handfuls of shredded chicken would go really well!

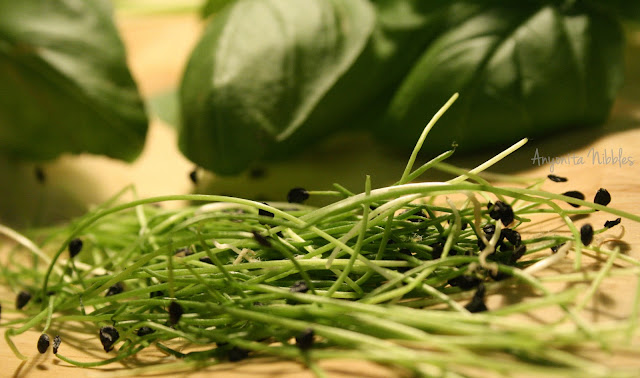
fresh garlic chives and fresh basil on a cutting board


10 Uses for: Lemon Curd

Monday, February 11, 2013


Lemon curd--a tangy kitchen staple. Sunshine in a jar on bleak wintry days. It's such a cinch to whip up and it has dozens of uses. Since I make so many macarons, I'm always looking for new ways to use up egg yolks (that don't involve baking gallons of ice cream!). Lemon curd is perfect for this!


So lemon curd is great on its own, but it's even better these 10 ways:
1. Sandwiched as a filling for lemon macarons
2. Baked into a moist poundcake
3. Frozen as a base for lemon sorbet
4. Spread on warm scones, (American) biscuits or toast
5. Mixed into tangy lemon curd cookies a la Nigella Lawson (How to be a Domestic Goddess)
6. Piped into homemade sugar donuts in place of jam
7.  Dolloped into the center of lemon poppy seed muffins
8. Combine with tarragon and warm up to use a sauce for fish
9.  Layered in between pieces of sponge cake
10. Thinned with a little bit of vodka, warmed and drizzled over a vanilla ice cream sundae, topped with whipped cream

How do you use lemon curd?


Gluten Free Sticky Slow Cooker Chicken Teriyaki

Tuesday, February 5, 2013

With literally hundreds of pins on Pinterest, this is sticky chicken teriyaki cooked in the slow cooker is the only teriyaki recipe you'll ever need! As one pinner said, "It's easy and full of flavor!"
Sticky Slow Cooker Chicken Teriyaki from www.anyonita-nibbles.com
Feeds 2 adults with leftovers

I've seen loads of slow cooker chicken teriyaki recipes on Pinterest, but after clicking the pin and delving into the recipe, I've found a lot of dissatisfied pinners. So, in love with the idea of making teriyaki over the course of a day instead of in one quick fry up, I decided to devise my own. The best thing about this dish is how tender and tasty the chicken is. The chicken is just shut up! good. The al dente veggies fit perfectly and the sticky rice? You'll be in heaven.

photo ||

Ingredients:

For the
1/3 cup brown sugar
1/2 cup gluten free soy sauce
1/2 tsp ground ginger
scant 1/2 cup chicken stock
1 pack (400g) chicken thigh fillets
2 tbsp cornflour/cornstarch
2 garlic cloves
2 tbsp honey
2 tbsp gluten free teriyaki sauce


Instructions:

Sticky Slow Cooker Chicken Teriyaki

  1. Simply put all of the ingredients except for the teriyaki sauce in the slow cooker and cook on low for 4 to 6 hours. Half an hour before you're ready to stop cooking, add the teriyaki sauce and increase the setting to high.
  2. Prepare your side items. I made sticky rice and pan-fried broccoli with spring onions/scallions to go with the dish and they were delicious!
  3. Troubleshooting: if your sauce hasn't reduced fully by the time you're ready to add the teriyaki sauce, simply pour the food from the slow cooker into a saucepan on the stove, add the teriyaki and reduce until desired stickiness. It should take anywhere from 10 t 20 minutes to be fully reduced.
  4. Want to use different greens? Consider cucumber sliced into thin ribbons with a vegetable peeler or a chiffonade of thickly-textured savoy cabbage. You could even throw in some carrot matchsticks and radishes.
Chicken Teriyaki Finished with Sesame Seeds from www.anyonita-nibbles.com

Gluten Free Orange & Parsley Whole Roast Chicken

Monday, February 4, 2013


Whenever I go back home to North Carolina or speak to any of my friends from the States, someone always asks me about the food in the UK. Of course, straight away, everyone thinks of fish and chips, bangers and mash, mushy peas and trifles. And while I do love all those (except mushy peas!), they're not really one of the things that stands out to me about British cuisine.

For me, there's nothing better than a proper Sunday roast dinner. It's a concept that doesn't really exist in America, while in the south we do have our usual big Sunday dinners and roast tends to refer to pot roast, not an oven cooked roast bird.

In fact, I don't think I ever had roast chicken until I came to England. Sure, I'd had rotisserie chicken and it's kind of the same, but I'd never had chicken like this. Since my first experience with a proper Sunday roast, I've been trying dozens of different recipes, recreating this classic dish. The latest effort is a juicy, fragrant chicken filled with fresh orange, garlic and parsley.

Groceries
1 whole chicken, large enough to feed your family
1 navel orange, halved
1 tbsp parsley
1 bulb of garlic, stalk copped off to expose the cloves
salt and pepper
butter or margarine

Alright, let's cook!
To prepare your chicken, go ahead and remove the twine trussing it together, so you can really get at the bird. If you want to retruss it (you don't have to), save it. If not, chuck it in the bin.

Squeeze one half of the orange onto the skin of the chicken, rubbing the orange against the chicken, too. Once done, place this half, the garlic, parsley and seasoning into the cavity of the chicken. Next, slather the bird in butter. I mean really coat it. Get your elbows out and really work it in. Take the remaining orange half and squeeze it over the butter and place this in the cavity as well.

Cook the chicken according to the packet instructions, but a medium sized chicken should take about an hour on a preheated oven set to 200c/400f. Once the juices run clear will pierced with a skewer, you'll know it's cooked. Remove from the roasting pan and leave on a cutting board to roast.

Pour the juices from the pan into a saucepan and simmer until reduced by about 2/3s. Add a splash or two of pulp-free orange juice and adjust the seasoning if necessary. Serve with your favorite vegetables and Yorkshire puddings or crescent rolls.

Gluten Free La Quiche Lorraine

Sunday, February 3, 2013


#eggmainsinminutes badgeQuiche, for me, is one of those nostalgic foods. There are various events in my life that I remember by thinking about the quiche I ate during them and thinking about the event itself after. My fondest memory of quiche has to be from 2008 when, living in Manchester for the first time as a study abroad student, I huddled around the small island in my communal kitchen with a few other Americans and some Aussie friends and learned how to make a quiche lorraine from scratch from a French girl living with us.  I wish I could say that the recipe I'm going to share with you is the recipe she taught us that day nearly five years ago, alas, it is not. But it's a close second.
This post has been included in the #eggmainsinminutes linky on Brit Mums. You can find more information about Main Meals in minutes here.

Groceries
3 large free range eggs
1 1/4 cup double (heavy) cream
1 cup milk
salt & pepper
1 1/2 tsp  nutmeg
1 tsp tarragon
2 cups nutty cheese + more for sprinkling (Swiss, Emmental or Edam all work well)
2 cups chopped bacon or leftover ham
gluten free shortcrust pastry

All right, let's cook!
On days when I'm stressed and need some time in the kitchen to bake, I'd make my own shortcrust pastry. But, when I made this this weekend, I was pressed for time, so I have no qualms about admitting that this recipe features shop-bought shortcrust. To that end, you should begin by letting your pastry come to room temperature while you preheat the oven. You want it fairly low heat--150C or 200F.

Next, it's just a matter of putting in, whipping up and pouring out: eggs in, beat. Add cream and milk, season; ad nutmeg and tarragon and mix well before adding bacon or ham and cheese.

Line a pie pan or baking dish with the pastry. Prick pastry with a fork before sprinkling some cheese onto base before pouring contents into dish. Pop into oven and cook. It should only take about 20 to 30 minutes before it is set and ready to serve. I served it up with a fresh green salad.